Getting your land ready for construction is the difference between a project that runs smoothly and one that costs you thousands in delays and repairs. Land preparation includes surveying your property, testing the soil, clearing vegetation, grading the site for proper drainage, and making sure utilities and access roads are planned before foundation work begins. Most expensive problems blamed on contractors or materials actually start with rushed or incomplete site prep work.
Preparing land for construction involves understanding what sits beneath the surface and around your property. You need to know your soil type, where water naturally flows, what local codes require, and how heavy equipment will access the site. Each decision you make during construction site preparation affects everything that comes after, from foundation stability to drainage performance.
This guide walks you through the full site prep process, from your first property walk to final foundation readiness. You'll learn how to assess your land properly, navigate permits and regulations, choose the right foundation system for your soil, and avoid the common mistakes that turn simple builds into complicated repairs.
Initial Site Assessment and Planning
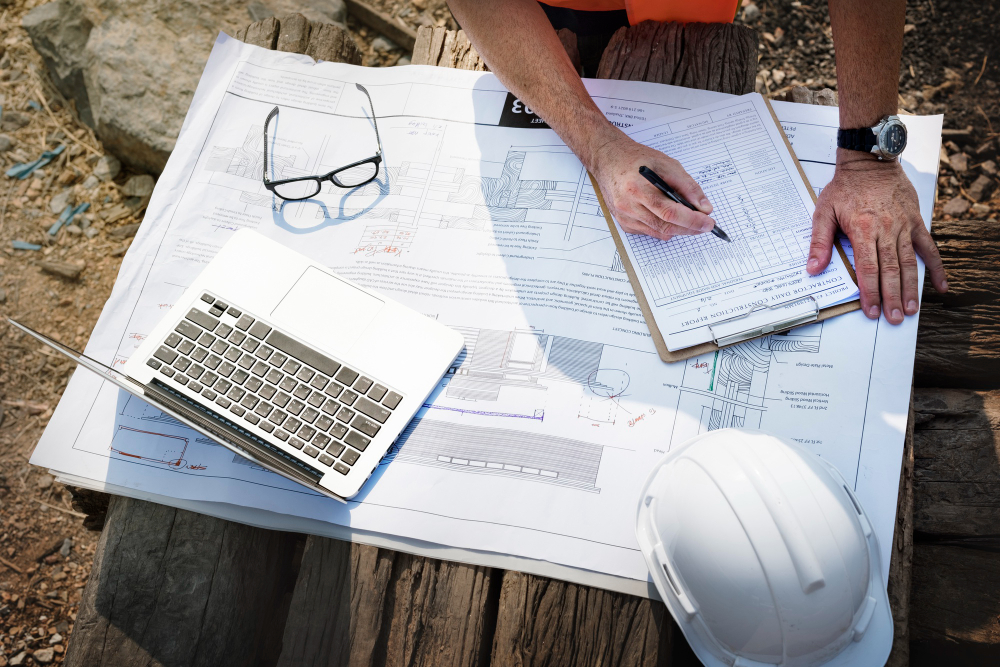
Before clearing or grading begins, you need to understand exactly what you're working with. A proper assessment reveals legal boundaries, physical conditions, and potential obstacles that will shape your entire construction timeline and budget.
Conducting a Site Evaluation
A site evaluation examines the physical and environmental conditions of your land before construction starts. This process identifies slope, drainage patterns, soil stability, and any natural features that could affect building placement or costs.
You should walk the entire property and note existing vegetation, water flow during rain, and any signs of erosion or settling. Look for rock outcroppings, wet spots, or areas where water pools after storms. These observations help you spot drainage issues early.
A site investigation also checks for potential environmental concerns. If the land was previously used for industrial, agricultural, or commercial purposes, you may need to test for soil contamination. Properties with streams, mature trees, or steep slopes often require additional permits or design modifications.
Document everything with photos and notes. This information guides your design team and helps you budget accurately for site preparation work.
Understanding Property Boundaries and Easements
Property boundaries define the legal limits of where you can build. Without confirmed property lines, you risk building on someone else's land or violating setback requirements that could force you to move or remove structures.
Hire a licensed surveyor to conduct a professional land survey. This survey marks exact property lines, identifies any encroachments from neighboring properties, and provides the legal description needed for permits. The surveyor will place stakes or markers at key boundary points.
Easements are legal rights that allow others to use portions of your property for specific purposes. Common easements include utility access for power lines, shared driveways, or drainage pathways. Your land survey will show recorded easements, but you should also check your title report.
Some easements restrict what you can build in certain areas. A utility easement might prevent you from placing a building or permanent structure where underground lines run. Review all easements with your surveyor and design team before finalizing your site plan.
Setting Project Goals and Timeline
Clear project goals keep your land preparation focused and on budget. Define what you're building, when you need to start construction, and what site conditions must be met before that happens.
Your timeline should account for the land survey, soil testing, permit applications, and actual site work like clearing and grading. Most projects need 8 to 16 weeks for assessment and permitting before physical work begins, though complex sites or strict zoning can take longer.
List your priorities in order. Do you need utilities extended to the property? Does grading need to happen before a specific season? Are there environmental permits that require months of review? Breaking the project into phases with target dates helps you track progress and coordinate contractors.
Build buffer time into your schedule. Unexpected soil conditions, weather delays, or permit revisions can push back your timeline. Planning for these possibilities keeps your project moving forward even when issues arise.
Navigating Regulations, Permits, and Zoning Laws
Before breaking ground, you need to understand and comply with three critical regulatory areas: local zoning requirements that control how you can use your land, building permits that authorize your construction, and environmental standards that protect natural resources and safety.
Complying With Local Zoning and Setbacks
Local zoning laws define what you can build on your property and where you can build it. Each zone has specific rules about building types, heights, and uses allowed in that area.
Setbacks are mandatory distances you must maintain between your structure and property lines. These measurements vary by location and typically include:
- Front setback: Distance from the street
- Side setbacks: Space from neighboring properties
- Rear setback: Buffer from the back property line
You need to review your local zoning regulations before purchasing land or designing your project. Contact your city or county planning department to obtain a zoning map and verify your property's classification. Some projects may require a variance if they don't meet standard requirements.
Pay attention to height restrictions, lot coverage limits, and parking requirements. Zoning laws also control density, meaning how many units or buildings fit on your land.
Obtaining Building Permits and Approvals
Building permits are legal authorizations required before construction begins. Your local building department reviews plans to verify compliance with building codes and safety standards.
The permit process typically requires:
- Site plans showing property boundaries and structures
- Architectural drawings with dimensions and materials
- Engineering reports for structural elements
- Proof of zoning compliance
You submit these documents and pay application fees. Review times range from a few weeks to several months depending on project complexity and local workload.
Building codes establish minimum standards for construction, electrical, plumbing, and mechanical systems. Your plans must meet current code editions adopted by your jurisdiction. Inspections occur at key construction phases, with a final inspection required before occupancy.
Meeting Environmental and Safety Standards
Environmental regulations protect wetlands, waterways, endangered species, and air quality. You may need environmental permits for grading, stormwater management, or disturbing protected areas.
Safety protocols start during the planning phase and continue through construction. Requirements include:
- Erosion control measures
- Proper material storage
- Worker safety equipment
- Traffic management plans
Your site must have adequate drainage to prevent runoff pollution. Some locations require environmental impact assessments before approval. Soil testing may reveal contamination that needs remediation before construction.
Safety measures protect both workers and the public. You need proper fencing, signage, and barriers around active construction zones.
Surveying and Soil Investigations
Before you break ground, you need accurate data about your property boundaries and what lies beneath the surface. These investigations reveal critical information that affects your foundation design, construction costs, and project timeline.
Property Surveys and Marking Out Boundaries
A land survey establishes your exact property lines and identifies existing features on your site. A licensed surveyor uses specialized equipment to measure and mark your boundaries with physical stakes or markers. This site survey also maps out elevations, trees, utility lines, and structures that might affect your build.
You need this survey data before you can create your grading plan or submit permit applications. The surveyor provides a detailed plot that shows where you can legally build and how far structures must sit from property lines. Most lenders and title companies require a current survey before they approve construction financing.
Keep survey stakes visible and protected throughout your project. Your contractor uses these markers to position the building correctly on the lot.
Soil Testing and Geotechnical Analysis
Soil testing tells you what's underneath your building site and whether it can support your structure. A geotechnical engineer collects soil samples by drilling or boring into the ground at multiple locations across your property. For a typical residential project, they might take samples 20 feet deep. Larger buildings require deeper testing down to bedrock.
The lab analyzes these samples for moisture content, composition, and how different soil types are layered. Geotechnical testing also checks for problems like expansive clay that swells when wet or a high water table that could undermine your foundation. The engineer delivers a detailed soil analysis report that includes specific recommendations for your foundation type and any soil preparation needed.
This testing usually takes about a month from sample collection to final report. Your local building department won't issue permits until you address any soil issues identified in the testing.
Assessing Load-Bearing Capacity and Soil Types
Your soil's load-bearing capacity determines what type of foundation you need and how deep it must go. The geotechnical investigation measures how much weight each square foot of soil can support before it compresses or shifts. Sandy soils typically handle 2,000 to 3,000 pounds per square foot, while dense clay might support 4,000 pounds or more.
Different soil types require different approaches:
- Clay soils: May expand and contract with moisture changes
- Sandy soils: Drain well but need proper compaction
- Rocky soils: Provide excellent support but are expensive to excavate
- Organic soils: Too unstable for most foundations
If your soil bearing capacity is too low, you'll need soil improvement work before construction. This might mean compacting the existing soil, replacing it with engineered fill, or installing deep foundation systems like piles that reach stable soil layers below the surface.
Site Clearing, Grubbing, and Demolition
Before construction begins, you need to remove everything that could interfere with your project. This means getting rid of trees, vegetation, roots, old structures, and any debris on your property.
Removing Vegetation and Trees
Tree removal and clearing vegetation are your first tasks when preparing land. You'll need to remove all trees, bushes, shrubs, and plants from the construction area. This process creates a clean surface to work with.
Heavy machinery like excavators and bulldozers handle most vegetation removal. For smaller jobs, you might use chainsaws and hand tools. Forestry mulching is another option that grinds vegetation into mulch, which can stay on site to prevent erosion.
The roots must come out too. This is where grubbing comes in. Grubbing removes stumps, root systems, and organic material below the surface. If you leave roots in the ground, they will decay over time and cause the soil to shift or settle. This creates problems for your foundation later.
You need to mark any trees or plants you want to keep before clearing starts. This prevents accidental removal of vegetation outside your construction zone.
Clearing Debris and Existing Structures
Demolition work removes old buildings, foundations, fences, and other structures on your property. Professional demolition contractors use excavators, jackhammers, and specialized equipment to break down existing structures safely.
Debris removal happens throughout site clearing. You'll deal with rocks, concrete chunks, wood scraps, metal pieces, and construction waste. All this material needs to leave the site or get sorted for recycling.
Most contractors haul debris away using dump trucks and loaders. Some materials like concrete and metal can be recycled instead of going to landfills. You should plan for proper disposal before work starts because debris piles up quickly during clearing and demolition.
Utilizing Professional Land Clearing Services
Professional land clearing services bring the right equipment and expertise to your project. Civil and excavation contractors specialize in site clearing, grubbing, and demolition work. They know how to assess your land, plan the work, and execute it safely.
These professionals use heavy machinery you probably don't own. This includes hydraulic excavators, wheel loaders, dozers, and compactors. They also understand local regulations about tree removal, debris disposal, and environmental protection.
Land clearing services typically include surveying your site, removing all vegetation and obstacles, grubbing below the surface, hauling away debris, and doing final grading. Hiring professionals saves you time and ensures the work meets construction standards. They complete the job faster and more thoroughly than attempting it yourself with rented equipment.
Grading, Excavation, and Drainage Solutions
Proper grading shapes your land to the right slope and elevation, while excavation removes soil to create space for foundations and utilities. Effective drainage systems protect your site from water damage and erosion during and after construction.
Grading the Land and Creating the Building Pad
Grading the land creates a stable, level surface that supports your structure. This process involves moving soil across your site to establish the correct slope and elevation based on your building plans.
The building pad serves as the foundation area where your structure will sit. Contractors use bulldozers and graders to shape this pad to exact specifications. They compact the soil in layers to prevent settling that could damage your foundation later.
Land grading also directs water away from your building. Your site needs a slope of at least 2% moving away from the foundation. This means the ground drops about 2 inches for every 10 feet of distance.
Key grading requirements:
- Soil compaction to 95% density or higher
- Level building pad within 1/4 inch tolerance
- Proper slope for drainage away from structures
- Stable base for foundation work
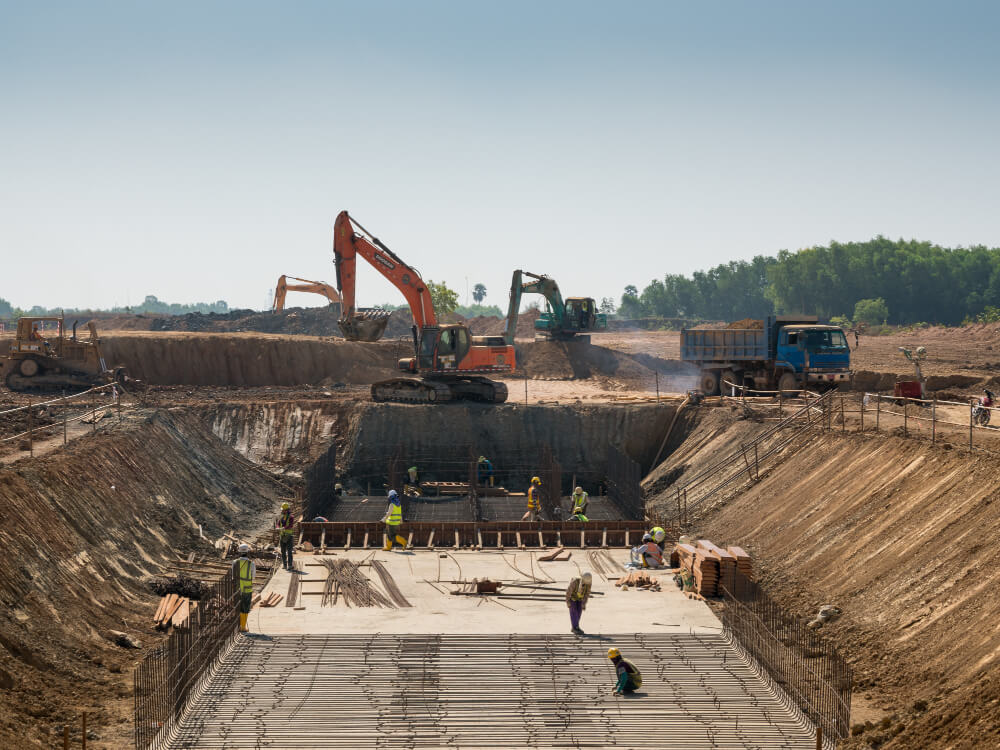
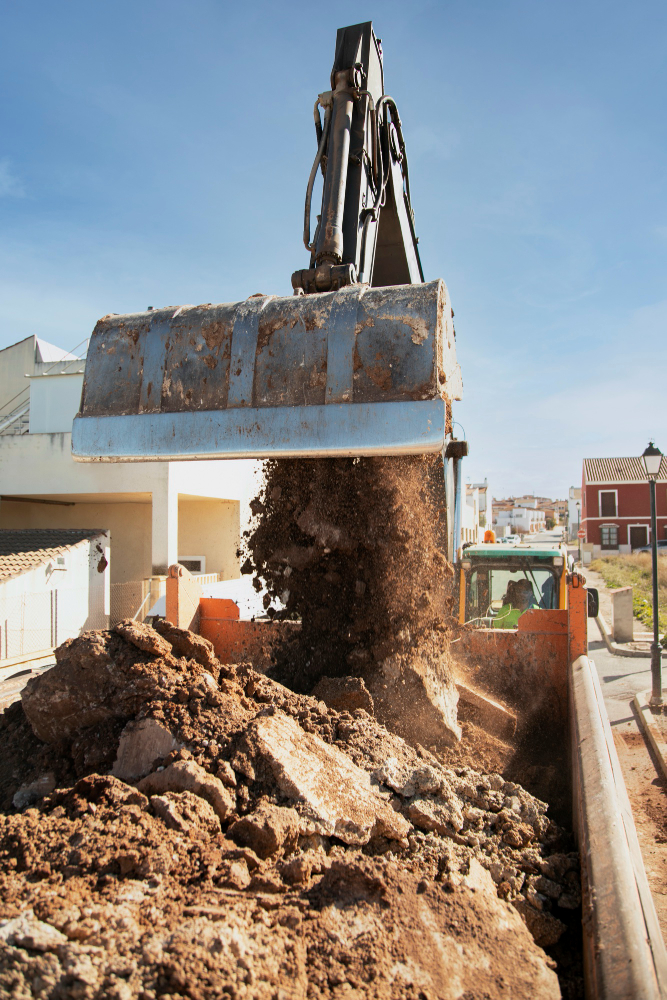
Excavation and Foundation Preparation
Excavation removes soil and rock to create space for your foundation. The depth and type of excavation depends on whether you need a basement, crawl space, or slab foundation.
For basement construction, excavators dig 8 to 10 feet deep or more. Slab foundations require 6 to 12 inches of excavation below grade. Your contractor removes unstable topsoil and reaches load-bearing soil or bedrock.
Foundation preparation includes installing engineered fill when needed. This specially selected material provides better support than native soil. Workers compact this fill in 6 to 8 inch layers to achieve proper density.
Retaining walls may be necessary if your site has significant elevation changes. These structures hold back soil and prevent collapse of excavated areas. They create level building areas on sloped terrain.
Drainage Systems and Erosion Control
Drainage solutions prevent water from pooling on your site and damaging your foundation. Stormwater management starts during site preparation and continues throughout construction.
Common drainage systems include:
- French drains - perforated pipes surrounded by gravel that collect groundwater
- Swales - shallow ditches that channel surface water away from buildings
- Culverts - pipes that move water under driveways or across the property
- Retention ponds - collect and slowly release stormwater to prevent flooding
Erosion control protects exposed soil during construction. Silt fencing creates barriers that trap sediment and prevent it from washing into streets or neighboring properties. Workers install silt fences along the downhill edges of your site before any dirt work begins.
Soil stabilization techniques keep your site intact during heavy rain. Temporary seeding or erosion control blankets protect bare earth. Proper drainage combined with erosion control maintains site integrity and meets local regulations for stormwater management.
Utility Planning and Access Roads
Getting utilities and access routes in place sets the stage for smooth construction operations. These systems need careful planning to work together without causing delays or safety issues.
Coordinating Utility Installation and Connections
You need to map out where water lines, electrical cables, gas pipes, and sewage systems will run before any trenching begins. This planning prevents conflicts between different utility lines and keeps them away from future building foundations.
Work with utility companies early to schedule connections and obtain necessary permits. Each utility type has specific depth requirements and separation distances that you must follow. Mark the locations of existing underground utilities before you start any excavation work.
Trenching should follow a logical sequence based on depth requirements. Deeper utilities like sewer lines go in first, followed by water, gas, and electrical lines. Plan temporary power installation to support construction activities while permanent electrical service is being established.
Keep detailed records of utility installation locations and depths. These records help prevent damage during later construction phases and make future repairs easier.
Planning Site Access and Temporary Infrastructure
Access roads need to support the weight of heavy equipment and materials throughout the construction period. Grade and compact the road base before adding gravel or other surface materials to prevent rutting and erosion.
Plan multiple entry and exit points when possible to improve traffic flow and safety. Consider the turning radius of large delivery trucks and equipment when designing road layouts.
Set up temporary infrastructure based on project needs. This includes construction trailers, equipment staging areas, and material storage zones. Position these facilities close to work areas while maintaining clear pathways for vehicles.
Establish drainage systems along temporary roads to prevent water damage and mud buildup. Install erosion control measures like silt fences where roads cross sensitive areas or slopes.
Foundation Systems and Final Site Readiness
Your foundation choice depends on soil conditions and building requirements, while proper installation and final verification ensure construction proceeds without delays or structural problems.
Selecting Suitable Foundation Systems
Shallow foundations work for stable soil with adequate bearing capacity. Concrete slabs sit directly on compacted subgrade and suit single-story buildings or homes without basements. Footings distribute loads across wider areas and support perimeter walls effectively.
Deep foundations become necessary when surface soils can't support structural loads. Piles transfer weight through weak soil layers to stronger material below. Steel or concrete piles get driven or drilled to depths where soil provides proper support. Piers work similarly but typically have larger diameters and reach bedrock or dense soil layers.
Your soil test results determine which system works best. High water tables often require deep foundations or special waterproofing measures for basements. Expansive clays need pier systems that extend below the active zone where soil movement occurs.
Foundation costs vary significantly between systems. A concrete slab on stable soil costs less than a pier and beam system requiring 20-foot depths. Match your foundation choice to actual site conditions rather than choosing based solely on budget.
Addressing Foundation Issues and Soil Challenges
Install a vapor barrier beneath concrete slabs to prevent moisture migration from soil into your building. Use 6-mil polyethylene sheeting or thicker, with seams overlapped and sealed. This barrier stops ground moisture from damaging flooring and creating indoor humidity problems.
Basement construction requires waterproofing on exterior foundation walls. Apply membrane systems or spray-applied coatings before backfilling. Interior drainage systems with sump pumps handle any water that does penetrate.
Poor soil requires removal and replacement with engineered fill. Organic material, loose sand, or high-clay content soils don't compact properly and cause settlement. Strip unsuitable material to stable layers, then build up with graded aggregate compacted in lifts.
Verify compaction with field testing at specified intervals. Nuclear density gauges or sand cone tests confirm your fill meets the required percentage of maximum density. Foundation areas typically need 95% compaction or higher.
Preparing for Construction Kickoff
Schedule your final inspection of all site preparation work before vertical construction starts. Walk the site with your engineer or inspector to verify grades match design elevations. Check that drainage systems function correctly and water flows away from foundation areas.
Document finished conditions with photographs and updated drawings. Mark locations where underground utilities cross the site. Record any field changes made during foundation preparation so future work doesn't damage buried infrastructure.
Test foundation forms and subgrade one last time. Confirm elevations are correct, forms are level and properly braced, and any required rebar or anchor bolts are positioned accurately. Clean out debris from foundation trenches or excavations.
Coordinate material deliveries for the next construction phase. Concrete pours need proper access for mixer trucks. Have your site roads and staging areas ready to handle increased traffic once building begins.
Frequently Asked Questions
Land preparation involves specific costs, permits, and technical requirements that vary based on site conditions and local regulations. Understanding these details helps you budget accurately and avoid delays during the construction process.
What are the first steps to take after buying land before starting a home build?
Your first steps should include obtaining a land survey, conducting soil testing, and reviewing local zoning regulations. A land survey establishes exact property boundaries and identifies easements or restrictions.
Soil testing evaluates the ground's ability to support your foundation. This analysis reveals soil composition, drainage characteristics, and load-bearing capacity. The results determine what type of foundation you need and whether soil improvements are necessary.
You should also check with local planning departments about building codes and required setbacks. Understanding these rules early prevents costly design changes later. Many jurisdictions require specific distances from property lines, wetlands, or other structures.
How much does it typically cost to clear, grade, and level a lot for a house?
Land clearing for a residential lot typically costs between $1,500 and $6,000 depending on vegetation density and terrain. Heavily wooded areas or sites with large rocks cost more to clear.
Grading and leveling usually range from $1,000 to $5,000 for standard residential lots. The final price depends on how much earth needs to be moved and whether you need retaining walls or drainage systems.
Total site preparation often falls between $3,000 and $15,000 for most single-family home lots. Difficult terrain, steep slopes, or poor soil conditions can increase these costs significantly. Always get multiple quotes from licensed contractors before starting work.
What permits, surveys, and inspections are usually required before site work begins?
Most jurisdictions require a land clearing permit before you can remove trees or vegetation. You also need a grading permit that approves your drainage and erosion control plans.
A professional land survey is typically mandatory to verify property boundaries and elevations. Building permits require this survey to confirm setback compliance and proper placement of structures.
Environmental inspections may be necessary if your site contains wetlands, protected species, or steep slopes. Some areas require archaeological reviews before ground disturbance begins. Permit costs vary by location but typically range from a few hundred to several thousand dollars depending on project scope.
How do you determine whether a lot needs soil testing or geotechnical engineering before building?
All building sites benefit from basic soil testing to verify the ground can support your foundation. Standard tests cost between $300 and $1,500 and analyze soil composition, compaction, and drainage.
Geotechnical engineering becomes necessary when you have challenging conditions like steep slopes, high water tables, or suspected contamination. Signs that indicate you need advanced testing include visible erosion, standing water, or unusually soft ground.
Lenders often require soil reports before approving construction loans. Building departments may also mandate testing in areas with known soil issues or seismic activity. The investment prevents foundation failures that cost tens of thousands to repair.
What utilities and site improvements are needed to build on unimproved land, and what do they cost?
Unimproved land requires connections to water, electricity, and sewage or septic systems. Water line installation costs vary widely based on distance to the nearest connection point but often ranges from $3,000 to $15,000 or more.
Electric service installation typically costs between $1,000 and $30,000 depending on how far you are from existing power lines. The utility company may charge per foot for line extensions beyond a certain distance.
Septic systems cost between $3,000 and $10,000 for standard installations on suitable soil. If public sewer is available, connection fees range from $5,000 to $20,000 in many areas. You may also need well drilling if municipal water is unavailable, which costs $3,000 to $15,000 depending on depth and local conditions.
Is it cheaper to build a house on land you already own compared to buying a finished lot?
Building on raw land you own can be cheaper if the site requires minimal preparation and utilities are nearby. You avoid paying the premium that developed lots command in the market.
However, site preparation costs can exceed the price difference between raw and finished lots. Extensive clearing, grading, utility extensions, and engineering work add up quickly. A challenging site may ultimately cost more than buying a build-ready lot.
The cost advantage depends on your specific property conditions and local market prices. Sites with easy access, good soil, gentle slopes, and nearby utilities offer the best savings potential. Always calculate total development costs before assuming raw land provides better value.
